


Last night, my son asked if we could make a sketch animation video together. He sat down for 20 minutes and knocked out a script (the one part of the video where I gave no direction). Then he began sketching out various parts of the video. At eleven o’clock, he began making the video. My goal was simple. Provide as little help as possible. But I quickly realized that I would have to provide some structure. So, I walked him through the process and slowly began to withdraw.
For the next four hours, he focused on the task at hand. It was a genuine creative flow moment, where I had to say things like, “Dude, we need to go to the grocery store” and “Hey man, you need to drink some water every once in a while.” But he was in the zone. At 4:00 p.m., he finished the video.
This is how it turned out:
Confession: I know I’m being one of those obnoxious dads, but I don’t care. I’m proud of what my son made.
But that leads to my next point. People often email me asking how I make sketch animation videos. I often answer sheepishly because I know my process is insanely laborious and not all that technical. It’s like a digital flipbook, in a way. But I thought I would share it here anyway.
The Creative Process
Step One: Write and Record the Script
It helps to think about the visual aspect of what you are trying to convey. In other words, choose metaphors and idioms if you need to. Find ways to keep the sentences shorter. Hook them into a visual organizational structure. Often, a podcast will have 3-4 minutes sharing one point but a sketchy video requires you to get that point across in ten seconds. It’s actually a chance to focus on precision of language.
Step Two: Storyboard
Okay, this isn’t anywhere near as complicated as the word suggests. This is essentially the visual concept for the animation (if you can call it that). I usually draw boxes with stick figures and arrows. I actually have a forced time limit on storyboarding where I will only allow myself five minutes from start to finish to get the whole idea across. It’s supposed to look crappy, but that’s okay. This is often where you can test out visual structures like trails, pyramids, boxes, etc.
Step Three: Sketch It
This is the part where I was initially way too slow. I was insecure about how my visuals would look. I was worried that people wouldn’t like what I had sketched out. There’s this strange perfectionism and shame for me when it comes to art. The fact that I use “doodle” rather than “illustrate” suggests I don’t see a ton of merit in my craft. I’m not an illustrator. At some point, though, I just had to find my own style.

Sometimes it’s more detailed:
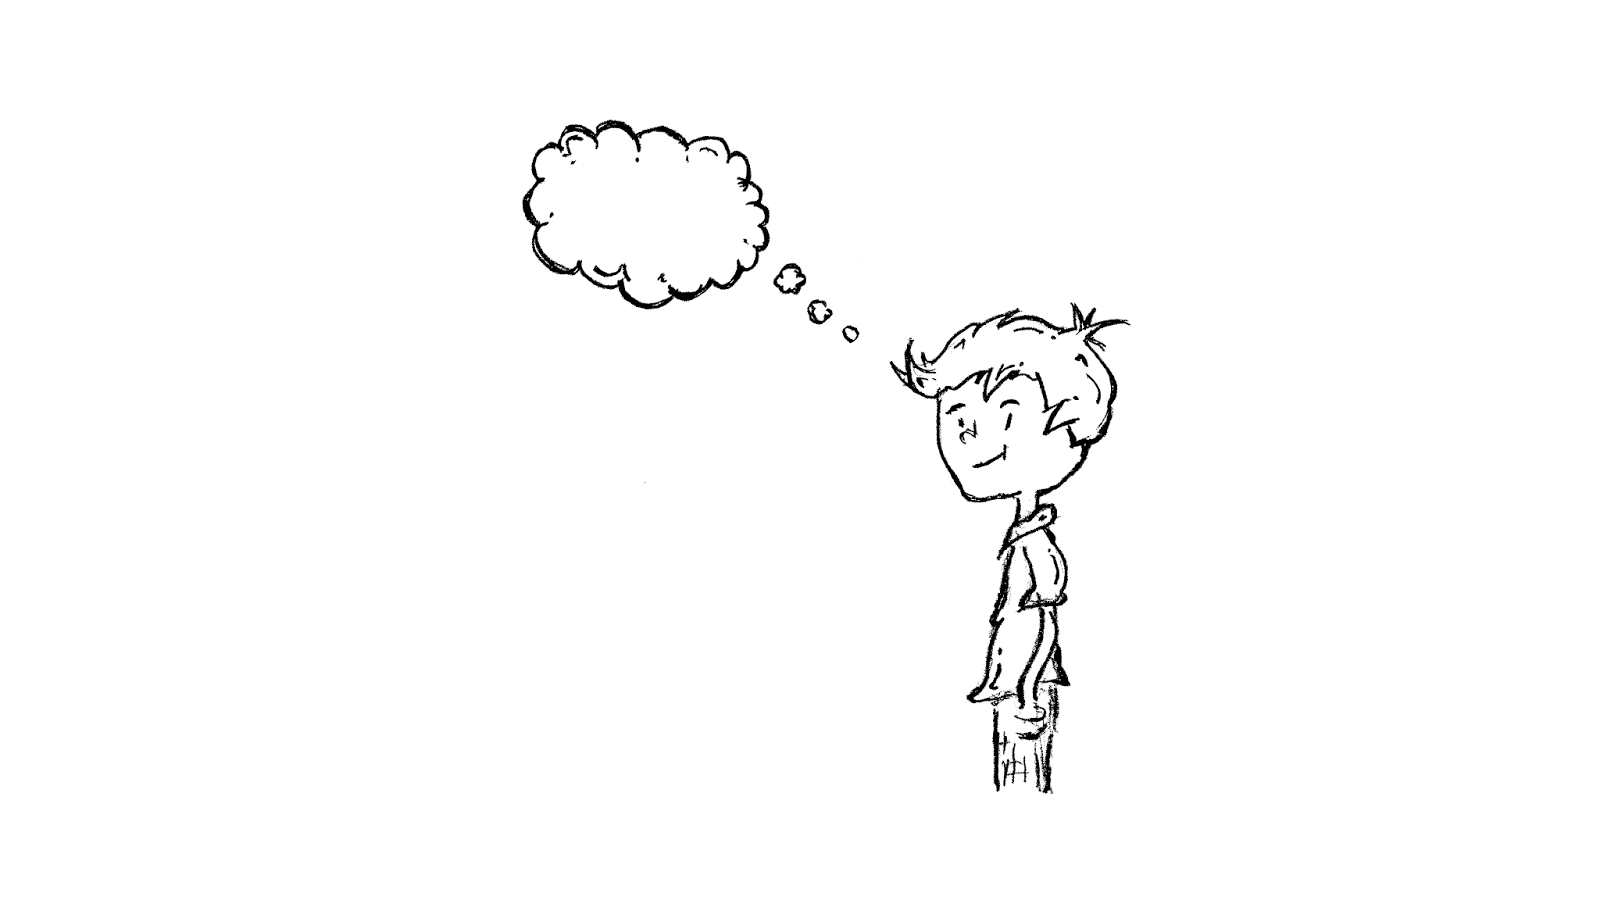
Other times it’s a little more simple:

Sometimes I use a pencil. Other times, I use a Sharpie (thin or thick). I like being able to decide how thick or thin the lines should be based upon my own personal preference. Note, too, that if you enlarge or reduce an image, you will change the final thickness of the lines. It’s why I generally like to draw everything to a similar scale.
Step Four: Scan It
Nothing fancy here. Just scan the picture with an old-school scanner (is it too early to call them old-school?) I use a 300 dpi setting (even though some would say it doesn’t matter as much when converted to video) and I keep it on the text setting rather than color or grayscale. This allows both pen and pencil drawings to show up in a crisp, pure black and white.
Step Five: Edit the Pictures
I have a standard blank slide that I use. I label it as 000.png. I keep the dimensions as follows:

From there, each individual slide will be added from what I have sketched. As I erase things and make tiny tweaks, they go into specific numerical places.
So, for example, I might start with this at 000.png.

And I want it to move to this, which is save at 010.png

I can then erase parts of it to move from 000.png to 010.png. Sometimes the animation is as simple as adding stick figures, opening and closing a door, or adding clouds going by to give the illusion of flying.
When this is done, I can do a quick review of the file by sorting it from start to finish. By sliding down the file folder, I will get a stop animation view (think flipbook) and see if there is anything missing.
This is what it looks like when it’s done. Notice the trail in this video:
Step Six: Edit on iMovie
Once these are finished, I drag all the pictures into iMovie and click the “fit” choice rather than the Ken Burns Effect. Under the information, I change each picture to 0.1 and then I go back and add longer times on certain slides.
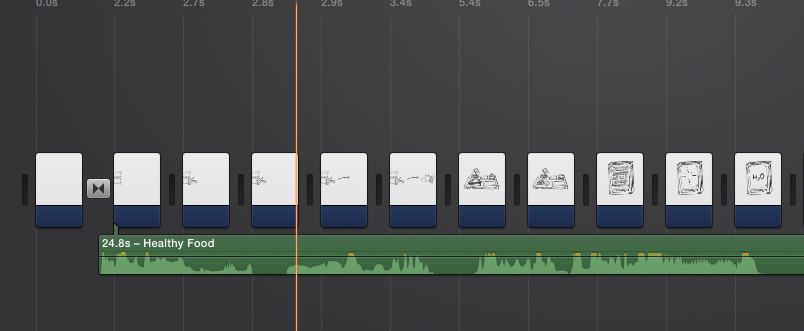
I then add my audio under the slides that I have created. I usually have to take about twenty minutes or so to change the times on some of the slides to go longer or shorter based upon my voice. If you are a slower talker, you might want to use the speed button on iMovie to speed up your voice (just click on “preserve pitch” so you don’t sound like a chipmunk).
And that’s essentially the whole process. There are probably faster ways to do this but I thought I would share it anyway in case you want to make your own sketch animation video.
If you are interested in creating sketch note videos with your students, there are actually 4 levels you can consider, going from easiest to hardest (the one mentioned above is the hardest). You can download the guide below.
Get Your FREE Guide to Creating Sketch-Note Videos with Students

Please leave your email address below and click the yellow subscribe button to receive the free resource. I will also send you a weekly email with free, members-only access to my latest blog posts, videos, podcasts and resources to help you boost creativity and spark innovation in your classroom.
You should turn this into some type of course for all the class flippers. Your videos are much more interesting than what most teachers are doing when they flip their lectures.
John, thanks for this. I’m confused at Step 5- the images. Is this an app to edit images? Are you making gifs? Are you creating the “change” from image 00 at 0 seconds into the image 10 at 10 seconds by creating images 2-9? I think that would be the “flipbook” part. So you are creating each bit of the animation, and then adding all the images to iMovie in the next step? Thanks.
This definitely made the animation process appear accessible and manageable. Prior to watching this, I was under the impression that these types of videos required expensive software and teams of people to animate and edit. I apparently was severely mistaken. This is a great medium for lesson delivery as well. I just started doing video lessons with my classes, and I am getting some really positive feedback from it. This tutorial has inspired me to start creating some animations of my own.
I teach seventh grade mathematics and I have seen students that struggle with attention, completely engaged when play a cartoon based on the day’s lesson. I find when I blend course content with qualitative entertainment value, the results tend to be more favorable. That’s awesome that your son is already talented enough to create these kinds of videos. He did an amazing job.
I liked ur sons video. Nice job with the drawings
The process is very creative which you have posted in this blog! The video gave a lot of information about to create a sketch animation videos. So this helped me out to solve my problems easily. Thank You!
This is amazing – kudos to your son for his imagination and skills- thank you for walking us through the process!
We’ve been using explainer video software to make ours: https://www.youtube.com/channel/UCWSUmMhbKbj1puuD1C4p6gg
but would love to try this method.
We’re siblings in high school and middle school that just started blogging – please take some time to check out our website at http://steamism.com – we would appreciate any feedback!
Awe this is so great, I’m more impressed with your parenting skills than any of the tech you use. What a great dad you are!
Hey Ruth! I agree with your comment, It’s a really enhanced skill, I just follow these steps are mentioned in the post.
I also try Adobe Animation CC tools for creating Animation, if anyone interested download from https://www.adobesupportphonenumber.com/
Your son is super cool! Im so impressed. 5 stars
Is there an easy iMovie-like app for Chromebook? I’ve tried Adobe Spark, which may be the best. Just wondering if anyone else has other experience with PC based apps.
Thanks for sharing, always loved ur videos!
I would love the easy version!
Thank you!
Very informative video, thanks for sharing.
Hey, nice article about “Animated videos”. I will definitely follow these for my company to give the best possible services to my customers. Keep on adding this type of valuable content again and again. Hope to read more from you. Thank you!